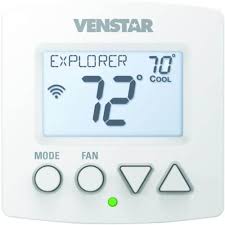
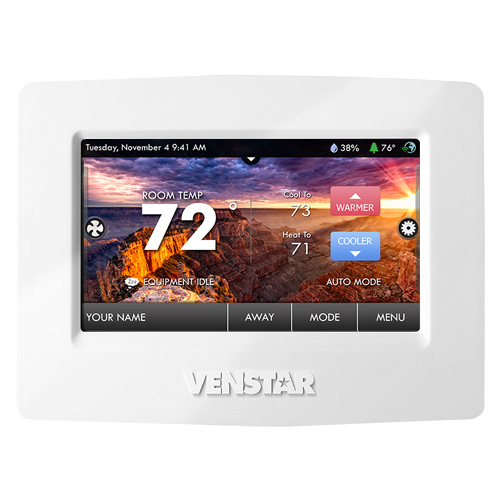
With a wide range of residential/commercial thermostats, HVAC-Compatibility helps you in selecting options that suit any HVAC need providing accuracy, efficiency, and energy savings. The compatibility of a thermostat often depends on the features associated with the HVAC system that is already installed.
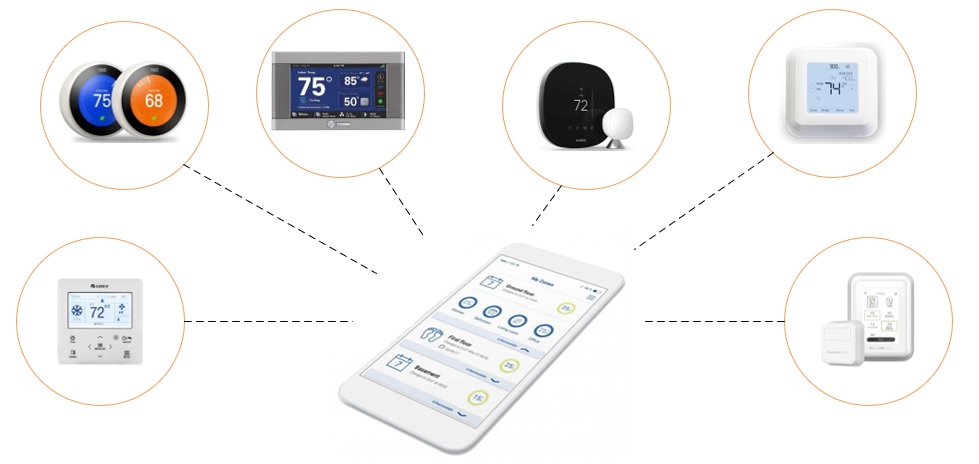
HVAC systems or equipment comes in many forms; heat pump, gas furnace, air conditioner, air handler, etc. with a variety of features. To be sure your thermostat can control all the features of your HVAC equipment, it has to work with all the operational modes of your HVAC system.
Quick Guide
Industry-standard Thermostat Terminal Designations/color codes guide
Prior to changing or replacing your thermostat, be sure to follow the manufacturer’s installation instructions or manual. We highly recommend using a qualified HVAC service technician to complete your task or contact us for guidance. Take note that whoever wired your thermostat may not have standard procedures and your color codes may not match the industry-standard color codes shown below. Determine this before disconnecting any wiring of your thermostat and/or better take photos of the wiring before disconnecting wires.
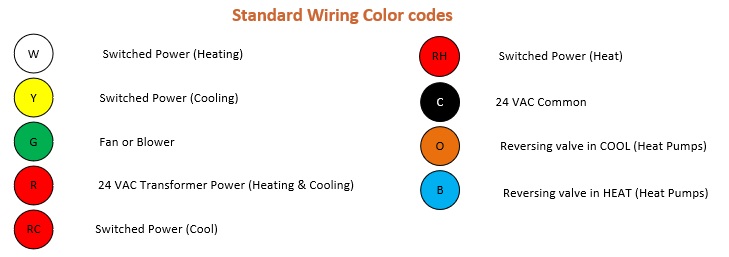
Thermostat Wiring
Thermostats are the control hub for heating, ventilation, and cooling systems. They provide access and control from a centralized location making it an important asset of the system. This makes knowledge on their wiring vital for any homeowner.
Before doing any installation, it is important to take note of the thermostat's voltage rating. The thermostats should not exceed the current capacity for the wires. If one is not trained to handle such electrical equipment, it is advisable to get a qualified technician to help in the set-up. This is key for safety. The majority of HVAC systems are rated at 24 Volts and in such a case they comprise of the following:
- Heating components: heat pump, gas furnace, oil furnace
- Cooling components: air conditioner, heat pump
- Accessories: humidifier, dehumidifier, ventilator plus other air quality equipment
How to wire a thermostat
The methods reviewed below can be used to wire thermostats
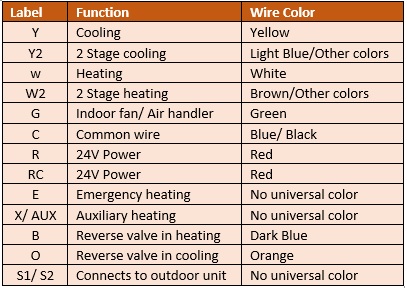
1. Use of standard wiring colors and labels
Different wire colors have their different functions as outlined in the table below. Follow the color schemes to carry out connections for different functions.
Sample Wiring Diagram
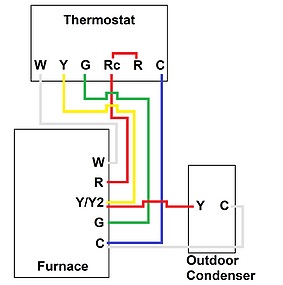
2. Replacing thermostat wire for wire
This is done when you intend to replace the thermostat without doing any changes to other system components. All wires for should not be necessarily used depending on required functions. To do this, proceed as follows.
- Turn off the power supply to the furnace/ air handler.
- Take a picture of the old wiring to work as a reference for the connection.
- Detach the wires one by one from the old thermostat connecting it to the new one.
- Turn the circuit ON and make any adjustments on the thermostat.
- If this fails to work, turn the system OFF and contact a certified HVAC expert.
3. Location of wiring connections to the air handler
You proceed with the following steps when there is no thermostat in place.
- Turn off the power supply to the furnace/ air handler.
- Uncover the furnace/ air handler.
- Identify positioning of the wires from the thermostat to the furnace. It ranges from 3-8 wires.
- Locate the wiring connection terminals on the furnace or air handler taking note of required wire colors.
- Connect properly colored wires to the correct terminals.
- Turn the circuit ON and make any adjustments on the thermostat.
Addition of C Wire
A Common wire is an extra wire that creates a continuous 24V power loop between the thermostat and the entire HVAC system. This way, the full potential of thermostats and their applications can be achieved. Basically, this provides the return path that completes the loop avoiding power disruptions. To identify a C wire, simply detach the thermostat from the wall and look at the wires connecting to it. If there is a wire connected to the terminal labeled C, that is the common wire.
If your system does not have a provision for a C-wire, there are several methods that can be used to add one. They include:
I. Use of C wire adapter kit
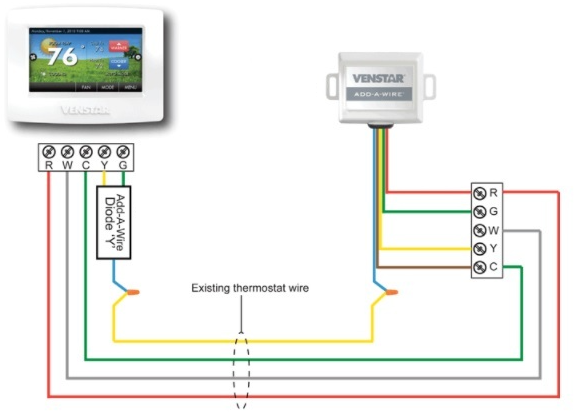
Some manufacturers including Venstar have an accessory such as Add-a-Wire Adapter that can help in solving C wire problems.
II. Using C wire in place of the existing G wire
III. Addition of C wire to the furnace
Running a new cable from the furnace to the thermostat to install this in a majority of the modern smart thermostat models.
Sample Wiring Diagram
Find and compare the suitable wireless /Wi-Fi thermostat for your home from the table below:
| Compare Wireless (Wi-Fi) Thermostats Specs | ||
| Item | Key Specifications | Available at these Online Market Places |
|
|
Connectivity: Wi-Fi, Wireless (Wi-Fi) Display: Full Color, Touchscreen Heat/Cool Stages: 4 / 2 Remote Access: Yes |
|
|
|
Connectivity: Wireless |
|
|
|
Connectivity: Wi-Fi, Wireless (Wi-Fi) Display: Full Color, Touchscreen Heat/Cool Stages: 4 / 2 Remote Access: Yes |
|
|
|
Connectivity: Wireless Display: Touchscreen, Lock Out Heat/Cool Stages: 1 / 1 |
|
|
|
Connectivity: Wi-Fi, Wireless (Wi-Fi) Display: Black & White Heat/Cool Stages: 2 / 2 Remote Access: Yes |
|
|
|
Connectivity: Wi-Fi, Wireless (Wi-Fi) Display: Full Color, Touchscreen Heat/Cool Stages: 4 / 2 Remote Access: Yes |
|
|
|
Connectivity: Wi-Fi, Wireless (Wi-Fi) Display: Full Color, Touchscreen Heat/Cool Stages: 4 / 2 Remote Access: Yes |
|


